This is a bit of a continuation of this article, where I talk about Jenkins, Drupal and CI/CD. In this case, I am not talking about Drupal, but about a Python/Django project I have been working on to track job applications rather than using a Google spreadsheet, which was getting a bit unweildy with hundreds of rows. This project is up on GitHub, here, and I will be referring to this project through part of this article.
The application
The first step was getting the application working with the local server. This basically involved the following high level steps.
- Setup database credentials.
- Create boilerplate Django application and get database migrations working.
- Add Django application to deal with job applications, writing the model, a basic view, etc.
- Create a command to use through manage.py to import the contents of my spreadsheet into the database.
- Integrate jQuery DataTables to make a huge static table paginated and easily sortable/searchable.
- Investigate methods to provide REST/AJAX data to allow loading parts of the table, filtering, etc. on data loaded from the server, rather than outputting the entire table to start with. (It might only be hundreds of records rather than tens of thousands, but might as well do it right!)
- Get filtering/sorting working with the REST API for DjangoRestFramework.
- Get details and edit buttons working (Adds are still being handled through the admin interface).
Docker
From there, the work was first to dockerize the application for deployment to "production", rather than relying on running it through a development server. I chose to use Docker rather than to rely on installing a bunch of files onto a local webserver. But to integrate with a production grade web server, this means that somehow we have to have to have the web server communicate with something running the Python code. One of the best ways to do this is through the Web Server Gateway Interface, or WSGI. But again, rather than hooking it up directly to a main web server, it includes its own webserver. This means using Docker Compose to build two containers in conjunction with one another. The first is a web server which runs gunicorn, and the second is an NGINX server to handle the connections from the web browser and to serve up the static content. This can be seen in the docker-compose-prod.yml file, as well as the files under the config directory, and has the nice effect of running these two machines on their own subnet. There is still some work to do here, but the .env file is actually a credential saved in Jenkins in an encrypted form, rather than relying on saving it in git or someplace else less secure.
In building the web container, I do a multistage build, which can be seen in Dockerfile.prod. First, we build a container to load/build all the Python and npm dependencies, and then we copy select directories over into the final image, without having things like a compiler or nodejs/npm in the final image. Later, when I have unit tests added, the build will not proceed unless all the unit tests pass.
I tested this by running the command docker compose up -d --build on the target host after copying the source into place. This does the docker builds, creates a network for the project, and then sets up the volumes and containers so that they can work together.
Jenkins and GitHub Integration
While all of this is great, it would be nice to be able to just push the code and have the new containers built and installed. Thankfully, Jenkins can do that for us. As I talked about in that previous article, Jenkins is able to take code from GitHub, build it if needed, test it and deploy it if things are good. But in that previous article, I did not have things quite to where they would happen auto-magically in moments (minutes) after things were pushed. I was relying on polling, and to keep the load down, I was polling once every 15 minutes. That means that it could take up to roughly 17 minutes for this to deploy if I had done the push just as Jenkins was polling. But this time, I revived an old task and got things setup so that when the push to GitHub occurred, GitHub could then automatically send a request to trigger Jenkins to do its thing. The steps are:
- Configure Jenkins
- Adding the credentials for accessing the server which will be running my application
- Adding the production .env file which will be used to deploy the application to production.
- Create a Jenkins pipeline to use the code from GitHub and a Jenkins file stored in the repository to deploy the application.
- Setup the webhook in GitHub with the address to poke to reach Jenkins.
- Because I have a firewall which by default blocks all attempts to connect to my machines, I had to setup a port forwarding from one of my static IPs to reach inside the firewall. In my case, this is to a proxy web server which resides inside my DMZ subnet, and in turn, from that proxy to my Jenkins server.
- I had to setup the proxy itself.
- Change the pipeline to accept the webhook as a trigger for the build.
The first of these tasks is to setup the credentials. Step 1a involves creating an encrypted SSH key which is permitted to connect to the production server, then adding it to Jenkins. I already had this set up, but the process is as follows:
- Use ssh-keygen to create a secure SSH key.
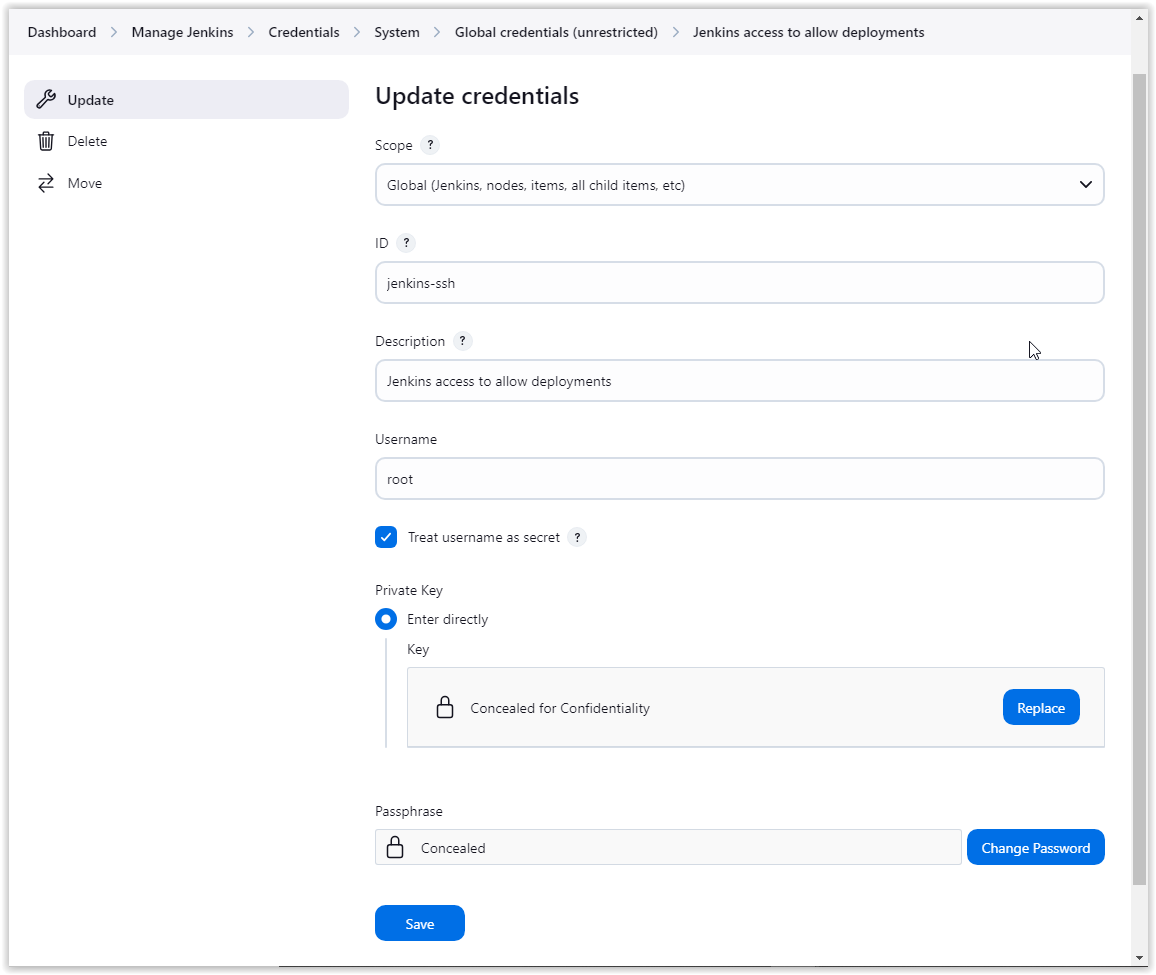
Go to Manage Jenkins > Credentials > Global credentials and Add a SSH Username with private key. There, you will click on the Enter directly toggle and add the private SSH key, and enter the passphrase for it. It will look something like this when you navigate to update it.
- Goto Manage Jenkins > Credentials > Global credentials and add a secret file. You will be able to upload the file, give it an ID to use in your Jenkins file, and a description. This file will look something like this.
For step 1c, in your repository, you will create a file named
Jenkinsfilewhich will look something like this. Then, you will define the pipeline by clicking on New Item in the dashboard, giving the item a name, selecting Pipeline, and clicking OK. The important part is the Pipeline definition, which will look something like this: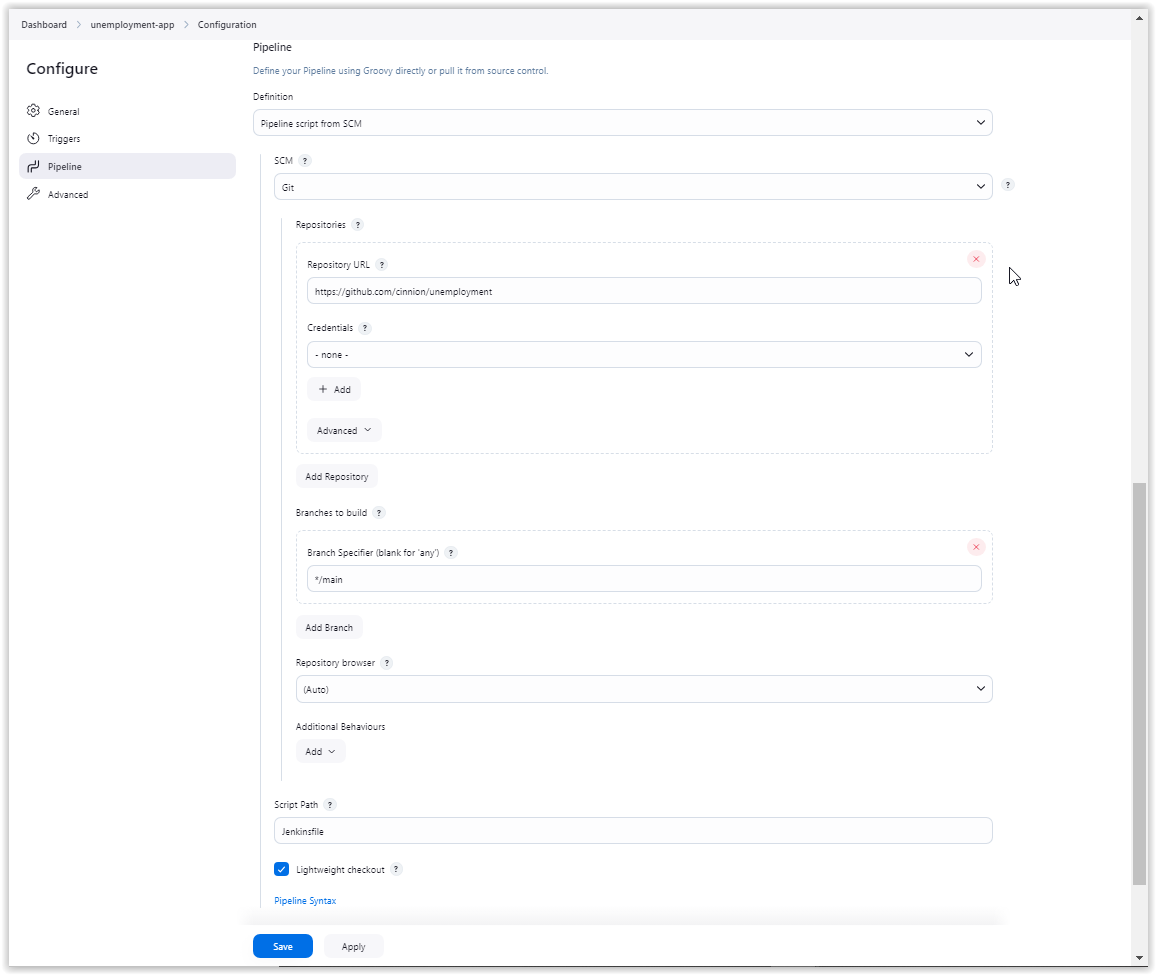
At this point, you should be able to test the build as much as you want, just by manually triggering the build in Jenkins.
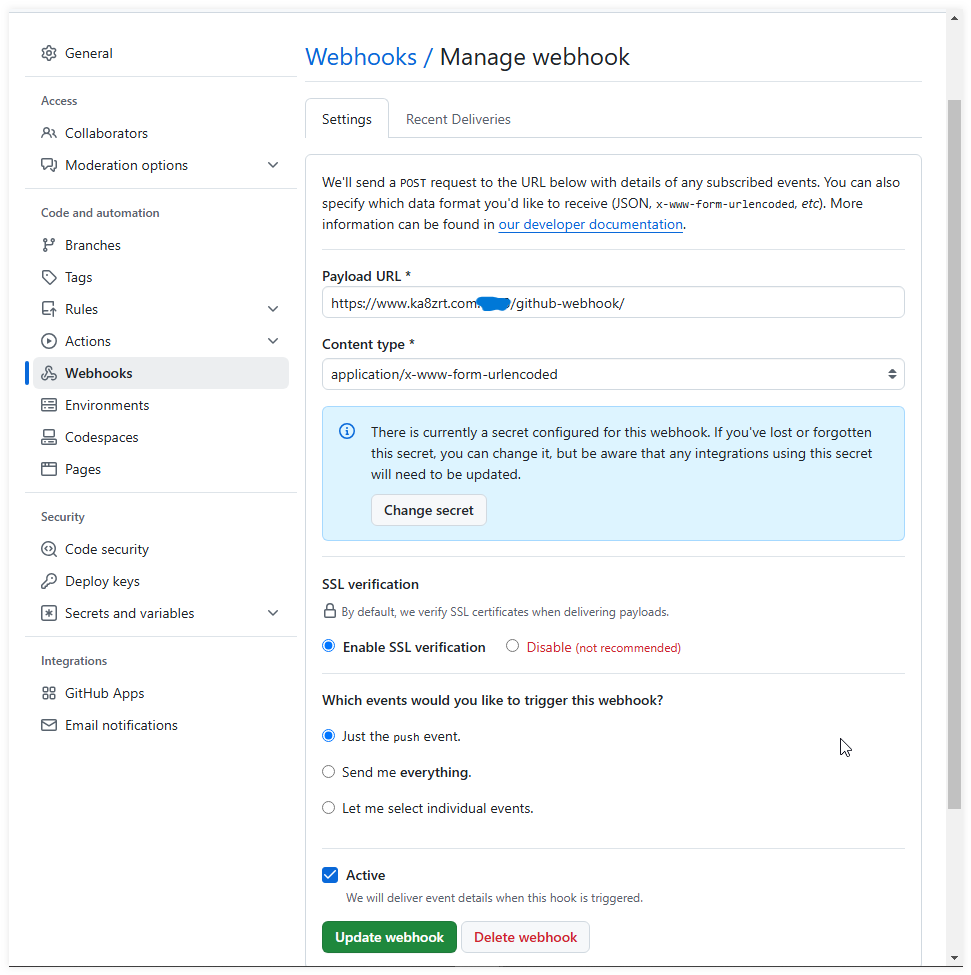
The next step is to setup the webhook in GitHub. On GitHub, navigate to your project repository, click on Settings, then Webhooks, and click on the add button. Once configured, it should look something like this:
- Next, I had to setup a port forwarding from the hostname/port I selected to receive the webhook connection. This involves setting up a NAT port forwarding with the proper destination IP/port, redirecting it to the host/port I want to receive the request. In this case, I chose a port other than the default port 8080 used by Jenkins, and redirected things to my bastion web server.
The second half of the port forwarding is to configure my bastion web server to proxy the request to my Jenkins server. The definition for this proxy in Apache looks something like this:
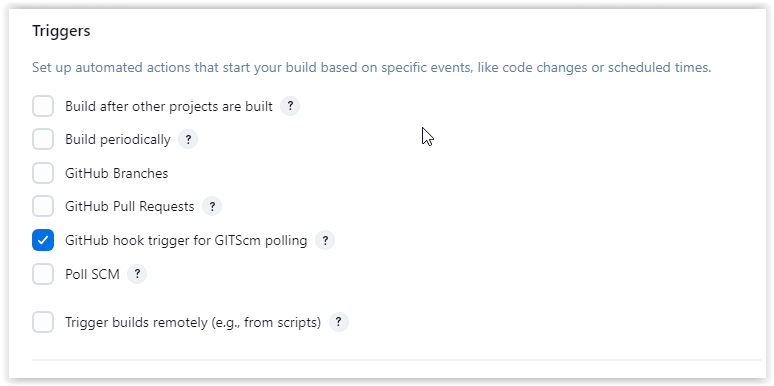
Listen 1234 https
<VirtualHost *:1234>
    ServerName          www.ka8zrt.com
    ProxyRequests       On
    ProxyPreserveHost   On
    AllowEncodedSlashes NoDecode
    ErrorLog            "logs/ci-error.log"
    CustomLog           "logs/ci-access.log" combined
    <Proxy http://jenkins.home.ka8zrt.com:8080/*>
        Order   deny,allow
        Allow   from all
    </Proxy>
    ProxyPass           /       http://jenkins.home.ka8zrt.com:8080/ nocanon
    ProxyPassReverse    /       http://jenkins.home.ka8zrt.com:8080/
    Include /etc/letsencrypt/options-ssl-apache.conf
    SSLCertificateFile /etc/letsencrypt/live/www.ka8zrt.com/cert.pem
    SSLCertificateKeyFile /etc/letsencrypt/live/www.ka8zrt.com/privkey.pem
    SSLCertificateChainFile /etc/letsencrypt/live/www.ka8zrt.com/chain.pem
    SSLCACertificateFile /etc/pki/tls/certs/ca-bundle.crt
</VirtualHost>
Once that is done, I have to tell Jenkins to accept the webhook trigger. I edit the Jenkins pipline, and make the following change in the triggers section:
At this point, I can do a push and test things. To see the results from the GitHub side of things, if you go to the webhook, edit it and click on "Recent Deliveries", you will see something like the following:
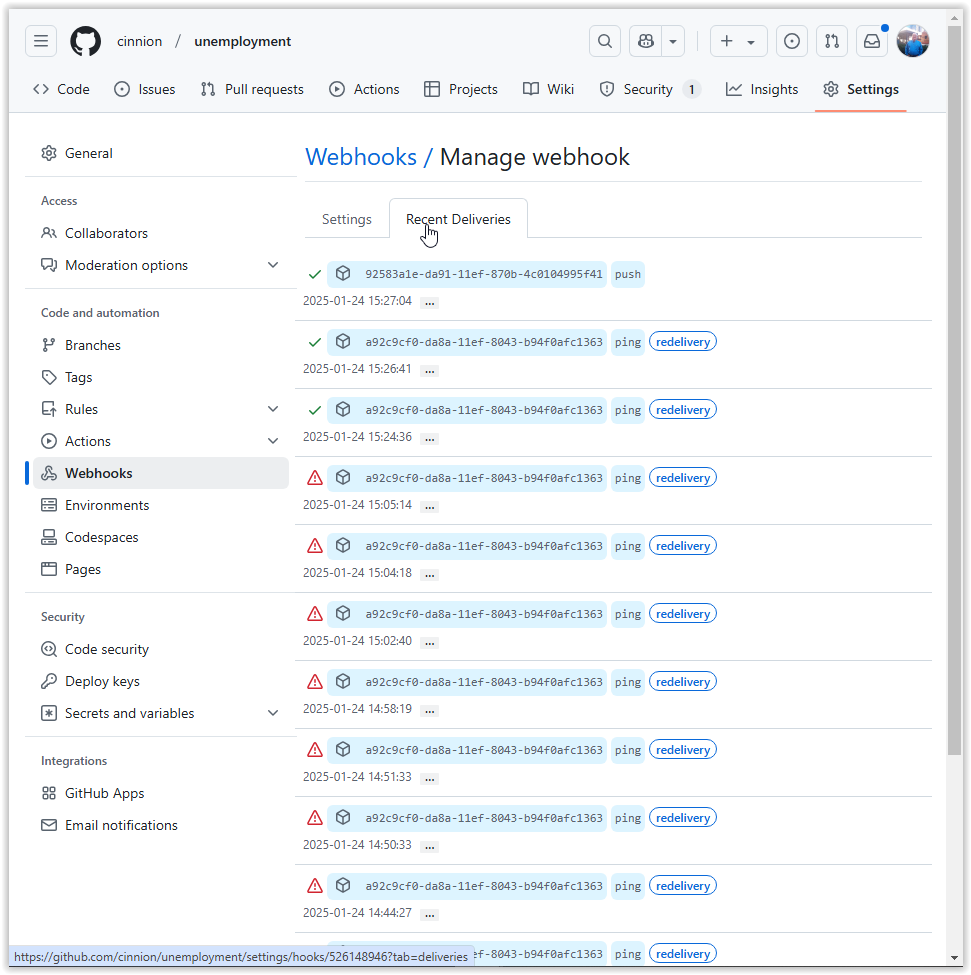
You can even click on any of those entries to get extensive details for a given delivery, successful or failed.
At this point, I currently only have two issues to work out. They are:
- Fix things so that when I push newer builds to my registry on my build node, those newer builds are what is downloaded on the deployment server.
- Fix an issue with the CSRF token, where I appear to have something not working.